
Some hairstyles have a way of transcending their era entirely. The glamorous finger waves 1920s is a style we all remember. They’ve moved in and out of fashion for over a century — and right now, they’re firmly back in the spotlight.
When Zendaya, Rihanna, Beyoncé, and Yara Shahidi all show up wearing variations of the same vintage technique, the beauty industry pays attention. But finger waves aren’t just a celebrity moment. They’re a legitimate technical skill with real staying power, and knowing how to execute them well is the kind of thing that sets a successful hairstylist apart.
This guide breaks down everything you need to know — what finger waves actually are, why they work, what products give you the best results, and how to create them from start to finish.

What Are Finger Waves?
Finger waves are a sculpted hairstyle that shapes the hair into flat, continuous “S-curves” that sit close to the scalp. The waves are created manually using fingers and a fine-toothed comb while the hair is wet and product-loaded, then set with heat until completely dry.
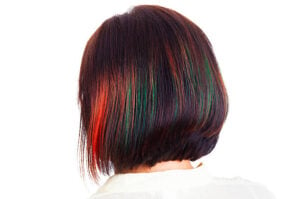
The result is a smooth, high-gloss finish with dramatic, dimensional movement — simultaneously structured and fluid. It’s a look that manages to feel both vintage and modern depending on how it’s worn and styled.
Finger waves have historically been most associated with Black and Brown communities and remain a signature style in those cultural contexts today. They’re worn for everything from everyday looks to formal events, and one of their most practical qualities is longevity — properly set finger waves can last multiple days with the right maintenance routine.
That staying power is part of what makes them so appealing to clients. One service, multiple days of wear. For stylists, that also means the pressure is on to get the technique right the first time.
Why Finger Waves Are Worth Learning
Beyond the cultural significance and the obvious visual impact, finger waves are worth adding to your technical repertoire for a few specific reasons.
They require genuine skill. Unlike some styles where product does the heavy lifting, finger waves depend almost entirely on the stylist’s hands, timing, and feel. You’re reading the hair in real time and adjusting as you go. That kind of tactile skill takes practice to develop, and once you have it, it shows across everything else you do.
They’re versatile. Finger waves can be worn as a full head style, on one side only, or incorporated into updos and half-up finger wave styles. They read differently on short versus longer hair, and the wave depth and spacing can be adjusted to create completely different effects. There’s a lot of creative range within a single technique.
They photograph exceptionally well. The smooth, sculptural quality of a well-executed finger wave set makes for striking portfolio content — especially on darker hair where the light catches each ridge and groove. If you’re building your book, this is the kind of work that stops a scroll.

What You’ll Need
Before getting into the steps, gather everything first. Working efficiently matters here because the hair needs to stay wet throughout the process — having to stop and search for a clip or a different comb mid-style can cost you the window.
Fine-toothed rattail comb — This is non-negotiable. A fine-tooth comb gives you the control to create clean, precise ridges. A wide-tooth comb won’t cut it.
Duckbill clips — You’ll use these to hold each wave in place as you work your way down the head. Have plenty on hand.
Mousse — Provides moisture and soft initial hold while keeping the hair pliable enough to shape.
Hair gel for finger waves — Provides the firm hold that locks the waves in place during the setting process. Make sure your mousse and gel are compatible products — some combinations flake or pill when mixed together, which will show in the finished look.
Spray bottle with water — The hair needs to stay wet throughout. Have this within reach.
Hooded dryer — This is what sets the style. A handheld dryer can work in a pinch but won’t give you the same even, controlled heat that a hooded dryer does.
Satin scarf or bonnet — For maintenance after the style is set.

How To Do Finger Waves: Step by Step
Step 1: Start with Clean, Saturated Hair
Finger waves are best installed on freshly washed hair. The reason is simple — freshly washed hair is fully saturated and at its most pliable, which makes manipulating it into clean wave shapes significantly easier. Hair that’s been dry for a while, even if you re-wet it, doesn’t always behave the same way.
After washing, don’t fully dry the hair. You want it soaking wet going into the product application stage. If the hair starts to dry out at any point during the styling process, mist it with your spray bottle. Keeping the hair wet throughout is one of the most important factors in getting clean, defined waves.
Step 2: Apply Your Products
With the hair fully saturated, apply mousse first, working it through evenly from roots to ends. The mousse does two things: it adds moisture and creates a soft initial hold that keeps the hair cooperative as you work.
Follow with the styling gel, applied generously. Don’t be shy here — this is what’s going to hold the wave pattern through the drying process. Apply it in sections so you get even coverage rather than piling it all on top.
Make sure both products are fully worked through before you start shaping. Uneven product distribution shows up in the finished waves as inconsistency in hold and definition.
Step 3: Choose Your Part
Before placing any waves, decide on the part. Most classic finger wave styles use a side part, which creates an asymmetrical flow that looks both polished and intentional. A center part is also an option and creates a more symmetrical, graphic look.
The part sets the direction of the first wave and everything flows from there, so take a moment to get it clean and precise. Use the tail of your rattail comb to draw the part clearly through the wet hair.
Step 4: Shape the Waves
This is the heart of the technique — and the part that takes the most practice to develop a feel for.
Place two fingers flat against the hair right next to the part. Using your rattail comb, push the hair forward toward your fingers to create a ridge, then sweep the comb back in the opposite direction to form the first curve of the wave. Your fingers hold the ridge in place while the comb creates the next movement.
Continue down the section, alternating the direction of each curve to build the continuous S-shape pattern. Each wave flows directly into the next — there shouldn’t be any flat or undefined spaces between them.
As you complete each wave, secure it with a duckbill clip placed right at the ridge. The clips hold the wave shape in place while you move to the next section and while the hair dries. Place them carefully so they don’t create dents or impressions in the wave surface.
Work your way around the entire head, keeping the wave pattern consistent in both depth and spacing. This is where the technique really shows — waves that are uneven in size or inconsistently spaced will be immediately obvious once the clips come out.
👉 Want to master every hairstyling skill in the book? Check out our blog on the History Behind the Slayed Edges Hairstyle and How to Pull it Off.
Step 5: Set Under the Hooded Dryer
Once all the waves are clipped and shaped, the client sits under a hooded dryer on high heat until the hair is completely dry. This is not a step to rush. If the hair comes out while it’s still even slightly damp, the waves won’t hold their shape — they’ll fall or lose definition within hours.
Complete dryness is the goal. The finished hair should feel firm to the touch, with a smooth, high-gloss finish that catches light along each ridge.
Remove the duckbill clips carefully once the hair is fully dry. If any clips leave slight impressions, a light touch with the comb can smooth them out.
Step 6: Finishing and Maintenance
Once the clips are out, the style is essentially done. A light shine serum or glossing spray can add extra luminosity if desired, but less is more at this stage — the style already has significant hold, and adding too much product can weigh it down or create buildup.
For at-home maintenance, advise the client to wrap the hair in a satin scarf or sleep in a satin bonnet every night. This protects the wave pattern from friction during sleep, which is the main thing that breaks down the style between wearings. With proper wrapping, finger waves can look fresh for three to five days — sometimes longer depending on the client’s hair type and how much they sweat.
Common Mistakes to Avoid
Letting the hair dry too fast. Work quickly and keep the spray bottle handy. Once the hair starts to dry, the waves become harder to shape cleanly and the product starts to set before you’re done.
Using too little product. This is one of the few techniques where being generous with product is actually the right call. Under-loaded hair won’t hold the wave pattern through the drying process.
Skipping the hooded dryer. A handheld dryer can work for touch-ups, but the hooded dryer provides the even, consistent heat needed to set the style properly from root to tip.
Rushing the clip placement. Clips that are placed carelessly — at the wrong angle or without fully capturing the ridge — can let the wave slip out of position before it’s set.
Removing clips before the hair is completely dry. It’s tempting to check the style before it’s fully done, but pulling clips too early is one of the most common reasons finger waves don’t hold. Wait until you’re certain the hair is dry all the way through.

Finger Waves as Part of Your Skill Set
Knowing how to execute finger waves well is the kind of technical depth that signals genuine range as a stylist. It’s not a service you’ll do every single day, but when a client comes in wanting it — whether for a special occasion, a photo shoot, or just because it’s their signature look — being able to deliver it confidently matters.
It also builds the kind of foundational hand skills — control, precision, reading wet hair, working under time pressure — that carry over into everything else you do. Stylists who master finger waves tend to find that their overall technique sharpens across the board.
If you’re thinking about how to build a strong cosmetology portfolio, finger waves are exactly the kind of work worth documenting. The visual drama of a well-executed set photographs beautifully and communicates technical ability immediately.
Ready to Build Skills Like This?
Finger waves are just one example of the kind of technique that separates stylists who know the basics from those who genuinely stand out. If you’re serious about developing that range professionally, formal training makes a real difference.
At Cosmetology & Spa Academy in Illinois, our cosmetology program covers everything from foundational cutting and color to specialty styling techniques — in a hands-on environment that prepares you for real work with real clients.
Curious about what the path looks like from enrollment to licensure? Our guide on how to become a cosmetologist in Illinois walks through the full process.

Frequently Asked Questions About Finger Waves
What hair types work best for finger waves?
Finger waves work across a range of hair types. Finger waves on natural hair are the most common, but they’re also done on chemically relaxed hair, where the texture responds well to the technique. Tighter curl patterns can be worked into waves with the right product load and technique. Very fine or slippery hair can be more challenging because it’s harder to hold the wave shape during styling.
How long do finger waves last?
With proper nighttime maintenance — wrapping with a satin scarf or sleeping in a satin bonnet — finger waves can last three to five days or longer. Hair type, activity level, and how much the client sweats will all affect longevity.
Can finger waves be done on longer hair?
Yes, though the technique is most commonly associated with finger waves short hair. On longer hair, the waves are typically placed at the crown and front sections, with the remaining length styled separately. The product requirements also increase with length, as you need consistent saturation throughout.
What’s the difference between finger waves and Marcel waves?
The end result looks similar, but the technique is different. Finger waves are shaped entirely by hand using fingers and a comb. Marcel waves use a heated curling iron — originally the Marcel iron — to create the wave pattern. Finger waves require more manual skill; Marcel waves rely more on the iron.
Do finger waves work on natural hair without relaxer?
Yes. Natural hair — particularly coily and kinky textures — can hold finger waves beautifully, often with even more definition than relaxed hair because the natural texture grips the product and holds the shape well. The technique may require more water and product to fully saturate and smooth the hair before shaping.
What products should clients avoid to maintain finger waves at home?
Heavy oils applied directly to the scalp can loosen the hold and cause the waves to fall faster. Clients should also avoid touching or running their fingers through the style — the natural oils from hands break down the product hold over time. Light edge control along the hairline can help keep the style looking fresh between appointments.
Is this a technique beginners can learn?
It takes practice, but yes — finger waves are absolutely learnable at any stage of training. The fundamentals are straightforward: wet hair, the right products, patient hand positioning, and consistent comb movement.
What separates a beginner result from an advanced one is mostly repetition and developing a feel for how the hair responds. The more you practice, the cleaner and faster your technique gets.


")
")

")


")